

5 Strengthening Yoga Poses to Ease Knee Pain
Do your knees hurt? Numerous people experience chronic knee or joint pain due to osteoarthritis, rheumatoid arthritis, or just stress from daily activities. Yoga poses are fortunately a tried-and-true treatment, though they can be intimidating for beginners.
It’s crucial to perform the poses correctly when performing yoga.
You can achieve successful results by practising slowly.
-
-
Triangle Pose
-
Trikonasana, known as the triangle pose, is a fundamental standing pose in yoga that strengthens and lengthens the hamstrings and groyne while also opening the shoulders and stretching the hips. “Trikona” is a Sanskrit word for “triangle,” and “asana” means “pose.”
The triangle shapes your body forms during the move give the foundational posture its name.
- Step the feet out in a wide stance to perform the triangle pose so they are parallel to your back. Your right foot must turn 90 degrees parallel to the mat’s horizontal edge.
- As your right leg straightens to engage the inner quad and thighs, your right knee should be bent in alignment with your hip and ankle, leaving both feet free.
- Reach the right arm down to the left side in a straight line, the right knee, hip, and ankle must all be lined up.
- As you attempt to extend your left side of the body toward the sky, maintain your core by setting down a block to support your right hand.
- Breathe in and out slowly.
-
-
Mountain Pose
-
Tadasana grounds your awareness in the present moment.
When you achieve presence at the moment, you let go of all holding on and let go of attachment, worries about the future and hurts from the past. Spread your toes while in Tadasana, and take a moment to appreciate the strength of the ground that supports you—every single one of you.
When practising yoga, Tadasana, also known as the Great Mountain, grounds you with its unwavering power of stability.
At the same time, the fundamentals of yoga are embodied in this seemingly simple pose.
At the same time, you allow the mountain’s majesty to envelop you as you instantly transform into it.
- To relieve knee pain, the muscles in this yoga position are aligned correctly.
- Making sure your feet are closely spaced is the first step.
- Lift through your core while focusing on your feet and core.
- To activate your calf muscles, press firmly on the ground while dispersing your weight evenly.
- To feel the stretch and tighten your abs, rotate your thighs and use your quadriceps.
- Lift your chin slightly; it should be parallel to the floor. Pull your shoulders back and down, so they are stacked over your ankles and hips.
- Hold onto this posture for about ten breaths while relaxing your face and engaging muscles with deep breaths.
-
-
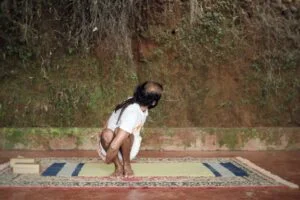
Half Moon Pose with Support
-
The Ardha Chandrasana is another name for the Supported Half Moon Pose. The muscles that support the knee can become stronger by performing this balance pose.
Half Moon Pose, also known as Ardha Chandrasana, is a difficult posture that puts your balance to the test. Root down with your standing leg and stabilising arm while lifting and extending your raised leg and opposite arm. This allows you to draw in energies from both the sun and the moon.
- Find a blank wall and a support block as the first step.
- After that, turn your right foot while standing with your back to the wall.
- Ensure that your foot is parallel to the wall at all times.
- Then, with your right hand holding the block, flex your right knee.
- Put your weight on your right leg to maintain balance.
- To straighten the right arm and leg, place the block on the ground close to the front of the right foot and press down with your right hand.
- Turn your body so that your left side faces upward and your back is parallel to the wall behind you.
- The left arm and left leg should form a straight line with the right arm. The left leg should be parallel to the floor.
- Hold this position, take a few deep breaths, and as you get stronger, gradually lengthen the pose.
-
-
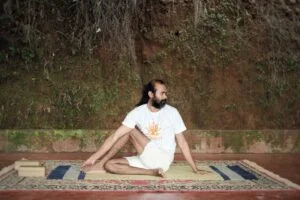
Supported Bridge Pose
-
Setu means “bridge” in Sanskrit, along with the words “all” and “limb” (sarva). As a result, when performing Setu Bandha Sarvangasana, your body forms a bridge using all of your limbs.
Visualise a bridge over the placid water as you inhale deeply and gather your strength to lift into this pose.
Supported Bridge pose (SalambhaSetuBandasana) is a gentle backbend that releases tension from your back muscles and opens your heart, chest, shoulders, neck, and throat. It also restores the natural curves of your spine, relieving back pain and/or tension.
- Laying flat on your back with your knees bent is the first step.
- Put your feet on the ground and bend your knees.
- As you stand with your feet hip-distance apart, put a block horizontally on the ground.
- Push the heels, inside and outside edges, and all four corners of the feet to stabilise everything.
- After that, push your lower back into the ground while drawing your navel toward your spine.
- Lift the bottom off the ground as high as possible without losing your form by tucking the tailbone in.
- You can roll your shoulders under and interlace your fingers to stretch your chest.
- Release your upper back down to the floor after a few breaths or seconds in this position.
- Lower the lower back and tailbone to the floor after gradually releasing the mid-back.
- To achieve the best results, repeat this action several times.
-
-
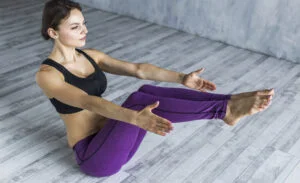
Chair Pose
-
The Chair Pose will fortify your thighs, which will support the stability of your knees. Your shoulders and arms will have more strength and flexibility, and your ankles will become more flexible and strong.
Your breathing capacity will increase as you raise your arms and stretch the muscles in your ribcage.
The pose can also improve your posture.
As you maintain the position, all of your core muscles contract, lifting your pelvis into a more upright position and preventing your spine from arching excessively as you reach your arms up and back.
- Put your feet together first.
- Put your arms straight out in front of your face.
- Then slowly squat down.
- As you lower yourself, squeeze your thighs.
- When you sit, your body will be in a diagonal position.
- Hold this yoga position for a moment while inhaling slowly and deeply.
- Once more, stand up.
These yoga poses can help you move more freely without being hindered by knee pain or stiffness by strengthening and easing knee issues.
It would help if you warm up before practising yoga to increase flexibility and range of motion to avoid injury. Don’t forget to add yoga to your strengthening routine and use SportMe to track your runs so you can advance deliberately.
Contact Us